A Cut Above the Rest: 6 Steps for a More Useful Field Necropsy
When you serve a feedlot with a quarter of a million-plus head of cattle with an average annual death loss of 2%, you get to necropsy a lot of cattle.
That describes Dee Griffin’s introduction to conducting post-mortems, as he entered the bovine veterinary workforce 35-plus years ago.
“I learned to appreciate that every animal laying in front of you, and this might sound a bit morbid, is a bit like a Christmas present. You don’t know what you are going to find until you get inside,” says Griffin, DVM, MS, director of the Veterinary Education, Research and Outreach Program at Texas A&M University.
While he tries to determine a diagnosis for each necropsied animal, that’s not his priority.
“Everything I’m looking for in an animal in a feedyard or cow operation is not about the unusual but is about what I see and how it impacts the management and sustainability of the animals in that group,” he explains.
A recent necropsy of a feedyard calf that died suddenly and unexpectedly is a case in point. During the post-mortem, Griffin saw adhesions in the calf’s lungs that he says could have been used to pull a pickup.
“They were beyond mature,” he says. “They were abscesses that had liquified. The animal had been sick, I suspect, for more than eight weeks.”
The severity and length of time the animal was sick told Griffin the feedyard likely had a cattle sourcing issue — information that could significantly affect its bottom line.
“To give that kind of information back to management is very valuable and can guide production management decisions,” he says.
Such information can also be used to sharpen the eyes of feedyard cattle caretakers or ranch employees as they evaluate animals day-to-day.
As a service to practitioners, Griffin has provided Bovine Veterinarian with a summary of six practical steps he uses to perform a field necropsy.
In preparation for the necropsy, Griffin says to keep in mind basic anatomy and gross pathology. Knowledge of the structure and function of the organ tissues you examine can be key to linking observations to a meaningful diagnosis.
“Be slow to jump to a diagnostic conclusion based on your first observations,” he says. “The ‘lift a leg and look’ or ‘peek-a-boo’ necropsies generally leave important production management observation undiscovered and minimize the value of the observations that could have contributed to better animal care and management.”
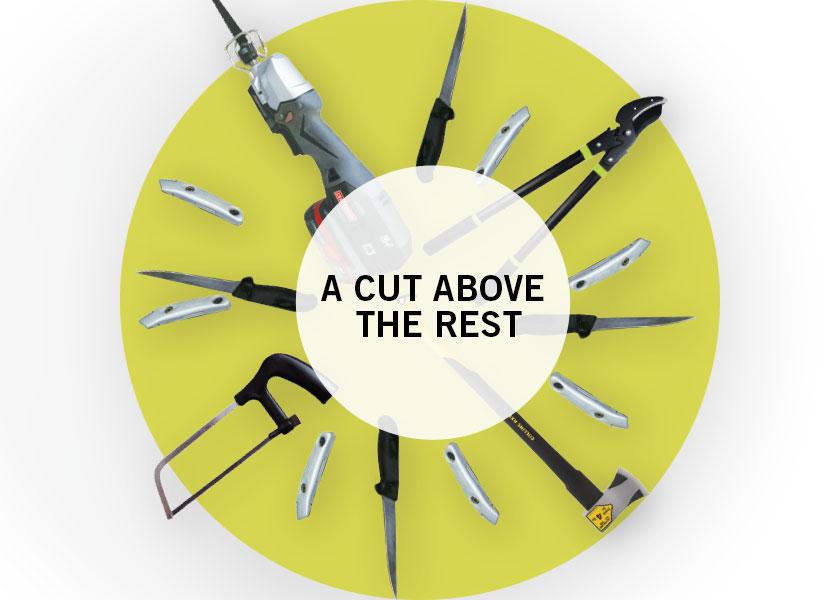
Also, make sure you’re equipped with the right tools for the job and use the proper safety precautions.
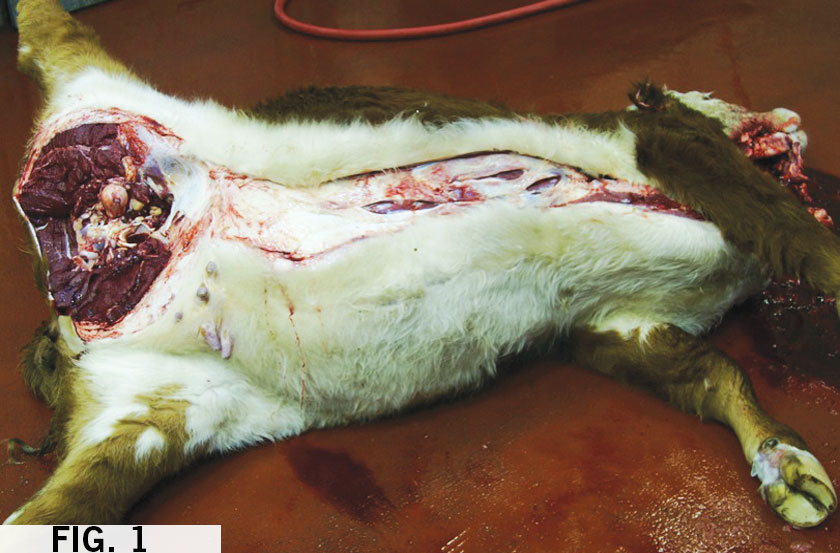
STEP 1 The overall incision will be lateral to the midline.
Start with the animal on its left side. Use a box cutter to cut along the underside of the jaw, over the larynx, down the neck and over the trachea. The incision should drift toward the animal’s right foreleg axillary space. Continue the skin incision along the ventral thorax. Cross the costal cartilages and go along the abdominal wall toward the right rear inguinal area. The incision across the thorax and abdomen will be lateral to the midline 3” to 6” (Fig. 1).
Do not cut the hide upward toward the scapula as you pass the foreleg axillary space. The hide is worth half of the value of the carcass to the renderer, and mutilating the hide reduces its value so much that many renderers will not pick up necropsied carcasses without charging a fee if the hide is damaged.
The best approach to examining the stifle and hock joints starts with the rear leg reflected. Then skin along the inside of the leg from the stifle joint past the hock joint. To examine the stifle joint, cut along the side of the femoral trochlea and cut above the patella through its attachment to the quadriceps down to the femur. The patella will rotate over, yielding a great view of the stifle joint. To examine the hock joint, slide your necropsy knife between the extensor muscles and the tibia and cut the extensors loose below the stifle joint. Retracting the extensor muscles will allow you to slide your knife down to the hock joint and pull the joint capsule up, thus allowing you to cut open the joint capsule without invading the joint with the tip of your knife blade. This allows for cleaner joint sampling.
Working from the back side, continue to skin the carcass toward the foreleg. When skinned to the level of the transverse processes and proximal rib attachments, the latissimus dorsi holding the foreleg down will be easily cut. Move to the sternal side of the animal and lift the foreleg, cutting the pectoral muscles. The foreleg should lay over with only minor fascia dissection.
STEP 2 Examine the oral cavity and neck structures:
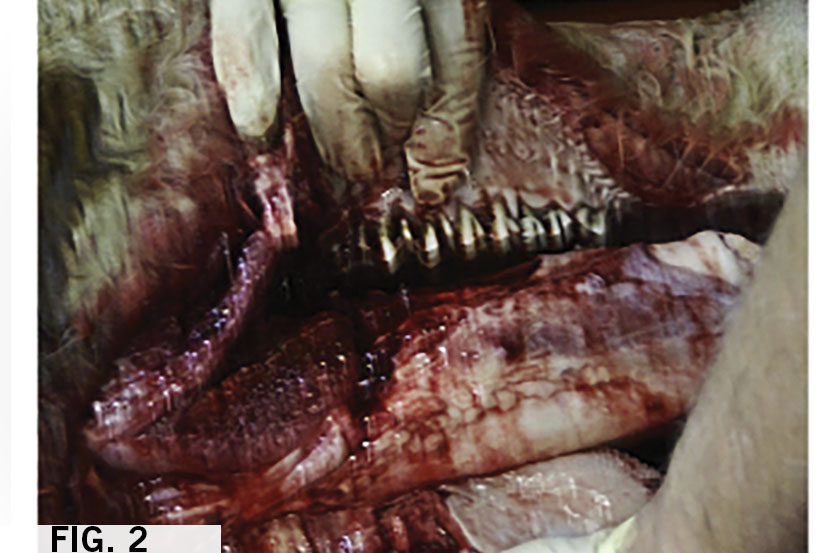
Incise along the side of the cheek, exposing the premolars and molars. This approach allows a very good view of the oral cavity and allows for examining molar eruption (Fig. 2). The first molar erupts in cattle at approximately 7 months of age and is in full wear at approximately 12 months. This information can be useful when examining stocker and light feeder cattle.
To examine the tongue and larynx, slide your knife on the caudal side of the hyoid bones, feeling for the bend formed between the epihyoid and the ceratohyoid bones. Your knife will generally cut the cartilage connection easily in younger animals. Shears can be used if needed.
Reflect the tongue while dissecting the larynx, trachea and esophagus. Open the esophagus, larynx and trachea down to the level of the thoracic inlet for examination. If a “bloat-line” observation is potentially important in the necropsy, this would be a good time to separate the esophagus from the trachea to the level of the thoracic inlet. Later in the necropsy, when the pluck is reflected over the first rib, the esophagus can be retracted through the thoracic inlet and its entire length can be examined.
STEP 3 Open the abdomen and thorax:
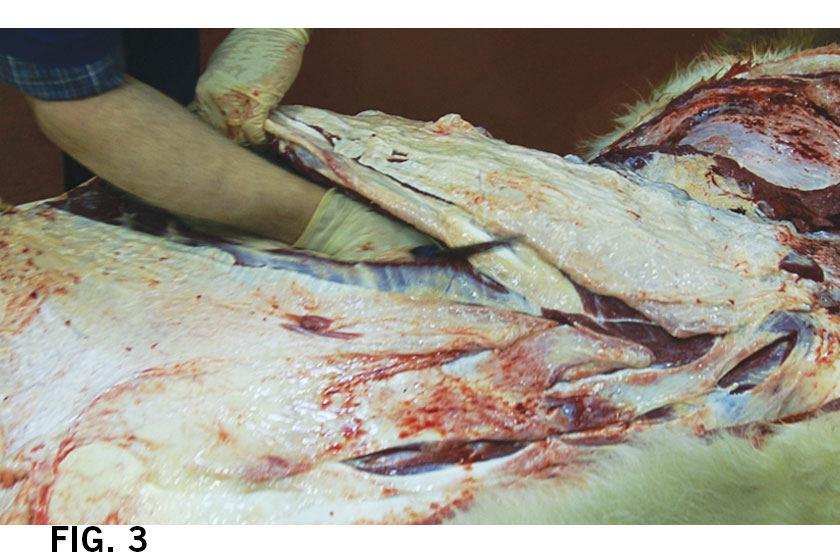
There are several acceptable ways to gain entry into the abdomen. Dr. Griffin generally starts by incising the abdominal wall along the greater curvature of the last rib, being careful not to incise the intestine. Once a hand-sized hole is made, he reverses the grip on his necropsy knife so the tip of the handle is forward and then slides his hand in the abdomen with the knife handle leading the cutting edge, incising the abdominal wall as he advances his hand (Fig. 3). The incision is continued until the abdominal wall can be reflected.
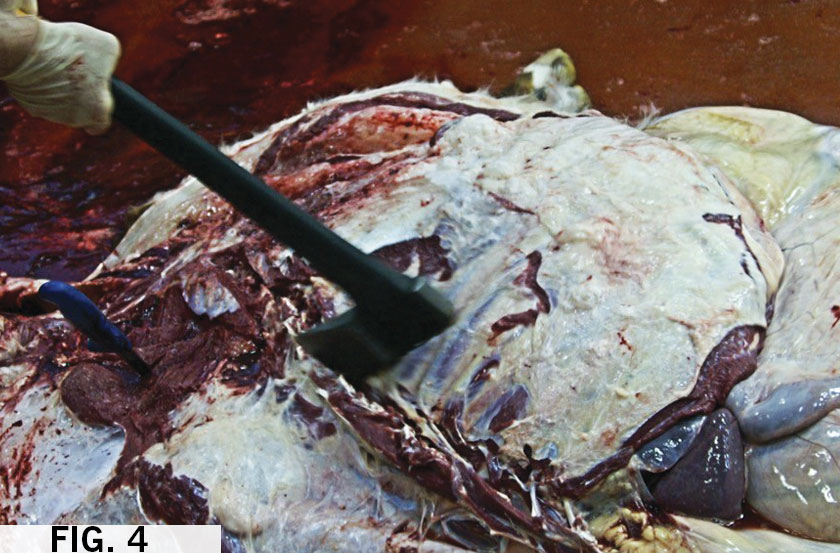
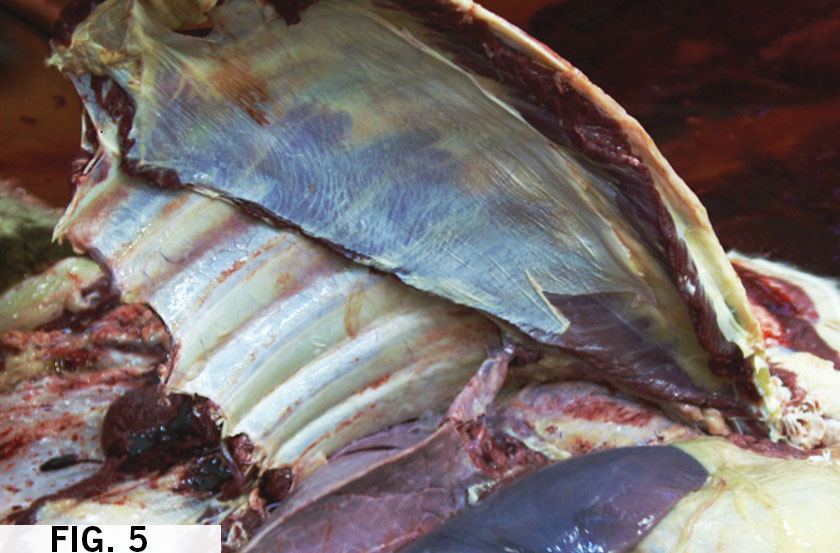
The greater omentum is cut away revealing the small intestine and allowing the abdominal viscera to shift away from the diaphragm, which is examined and cut free along its costal attachment. Using a shear or axe, cut across the distal ribs close to the costochondral junctions. The ribs may be separated and manually reflected by breaking the costovertebral joint, or you can cut across the proximal ribs close to the costovertebral joints and reflect the entire plate of ribs forward off the top of the thoracic organs (Fig. 4 & 5). Leave the first rib intact. This will hold the thoracic organs in the carcass as it is winched onto the rendering truck. It is always a good idea to be considerate of production personnel as well as those who work for the renderer.
STEP 4 Examine the thoracic cavity:
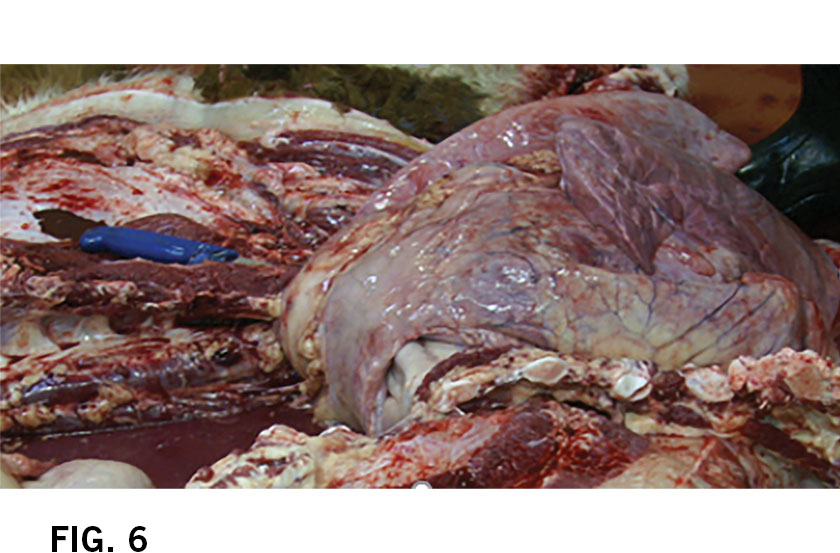
First, examine the pericardial sac and fluid. Detach the lung by cutting between the thoracic vertebra and aorta. Then, dissect the dorsal lung free from the anterior thoracic to the diaphragm. Next, free the caudal right lung lobe from the diaphragm by cutting the aorta, esophagus and mediastinal reflections (right and left) between the pericardial sac and diaphragm. Continue to free the pluck by cutting attachments between the pericardial sac and ventral thoracic. Reflect the lungs and heart forward over the first rib (Fig. 6).
Palpate the lung for abnormalities. Examine the tracheobronchial lymph nodes and airways. Examine the thoracic esophagus. The esophagus can be pulled through the thoracic inlet if a potential bloat line is of interest.
The heart’s pericardium, myocardium and endocardium are evaluated as the organ is opened. Start the examination with the right heart. Make an incision in the right ventricle just below the vena cava and extend the incision through the semilunar valves.
Extend the incision distally along the border of the right ventricular wall around its entire connection to the septal wall. This flaps the right ventricle and allows an excelled view of the tricuspid valve. To open the left ventricle, make an incision in the middle of the ventricle such that when opened the two large papillary muscles will lay on either side of the incision. Cut across the ventricle just below the coronary grove. This will form a T-shaped incision, allowing the bicuspid valves to be examined. The left semilunar valves can be examined by extending the vertical incision into the aorta.
STEP 5 Examine the abdominal cavity:
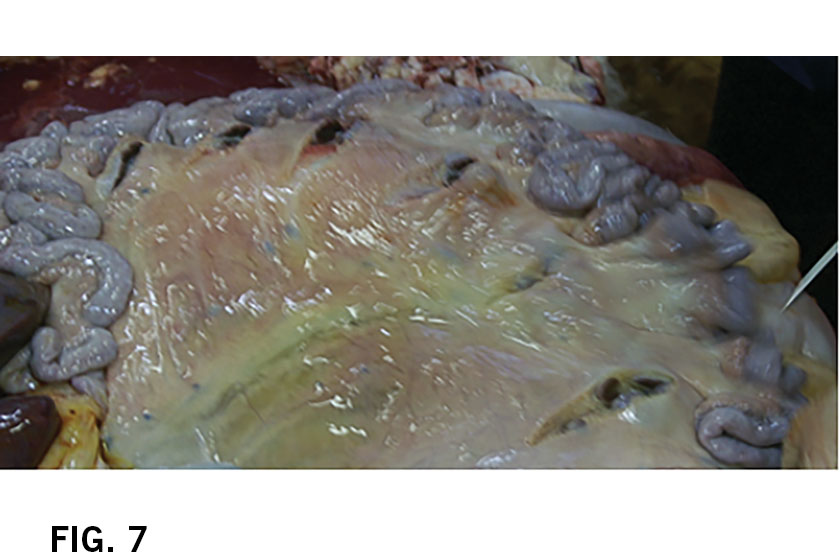
The small intestines can be fanned out or spread over the rumen for examination (Fig. 7). Autolysis generally makes opening the entire length of the intestine pointless. However, mesenteric lymph nodes will retain their architecture longer than bowel and are useful in evaluating inflammatory changes. Always examine the ileocecal valve for signs of inflammation as that could be associated with salmonellosis.
While the small intestine is spread over the rumen, examine the right kidney and liver. Flip the small intestine over the transverse processes to expose the small colon, left kidney, bladder, distal colon and rectum (or female reproductive organs) for examination.
Make a palm-sized hole in the rumen behind the anterior pillars. Reach in and find the ruminoreticular fold. Pull the fold to the surface and examine the side next to the cranial sack for acidosis lesions or scars.
Palpate the abomasum, reticulum and omasum for masses and normal texture. Reach under the anteroventral edge of the abomasum next to the diaphragm and grasp the spleen. Retract the spleen for examination. Open the abomasum to examine the surface for lesions such as ulcers, parasites or scarring.
STEP 6 Access the brain:
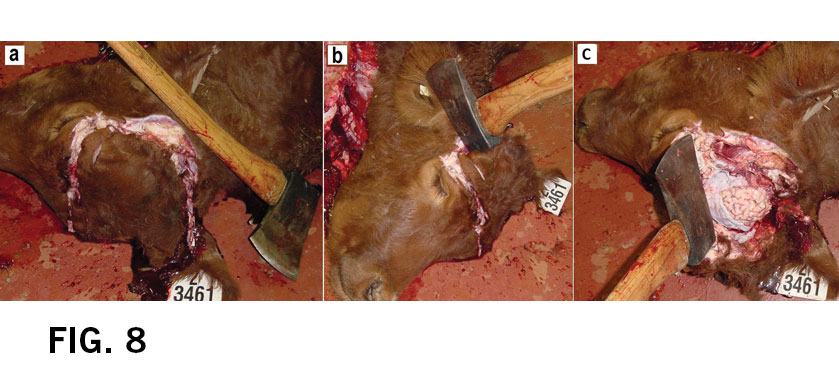
These are the basic steps (Fig. 8) for opening the skull with an ax to expose the brain:
a) Cut across the face just dorsal to the lateral canthus, then cut from the lateral canthus dorsal in front of the ear over to the poll, across the poll to the level of the opposite ear.
b) Using the blunt side of the ax, strike the edge of the cut bone between the lateral canthus and the ear at a 45-degree angle.
c) After completing step b, you should see the skull break away from the brain for easy removal.
To remove the brain, cut the dura mater across the cerebral falx, the tough medial division of the dura. Extend this cut to allow your fingers to slide beneath the cerebrum.
Using your necropsy knife, cut between the cerebrum and the cerebellum at the level of the pons, and lift the cerebrum out of the cranium. Next, split the dura mater covering the cerebellum dorsally. Slide the tip of your necropsy knife behind the cerebellum into the spinal canal and cut across the spinal cord distal to the obex. Lift out the cerebellum and spinal cord, containing the obex.
One final note from Dr. Griffin. He says the tool he uses is a single-bit, 2.25 lb. short, 28” handled ax. He advises against using a camp ax or hatchet, as they are unlikely to provide you with excellent results.
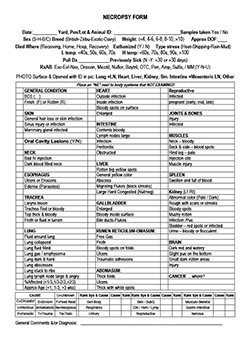
Necropsy Observation Collection Form Click here to download it.


